I wanted to “fix-up” part of my small kitchen so I hit Pinterest in search of cheap dollar store ideas. I’m not sure I found what became “my solution” in any of those Pinterest posts I looked at, but it sure can be fun and inspiring to go there and see what could work.
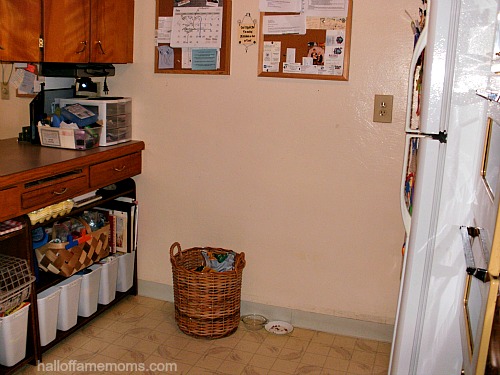
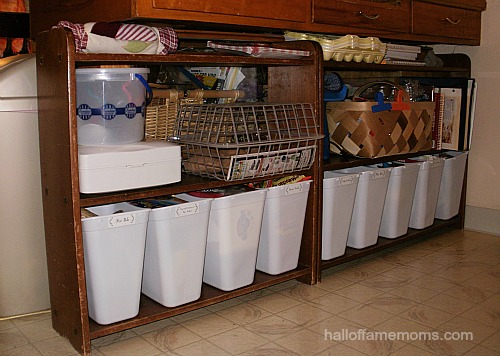
Because at first I was just winging-it, moving stuff around and not sure where this was all going to lead, I didn’t get an official “before” picture. I did dig up an older “before” pic that I can show though. First up is my “AFTER” pic.
My older BEFORE pic below: Up until about a week or so ago this is where my extra kitchen shelving was located. I was either using this shelf or one a bit longer that was made almost identical. As a side note, that horizontal metal curtain rod located under the bulletin boards has been long removed. It was a nice magnetic space for more photos, coupons or whatever.

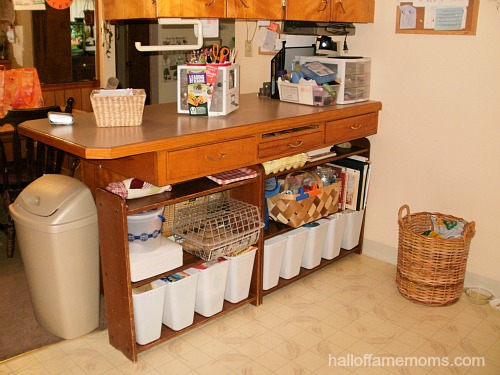
First, I moved my shelves (old shelves I had on hand) under the ledge of my breakfast bar. This area has a deep overhang due to the drawers built into it. This area is almost an island – its just connected to the wall at one end and it is the dividing line between the kitchen and the dining room.
This was a great area for my old book shelves – it was almost like they were made to go there.
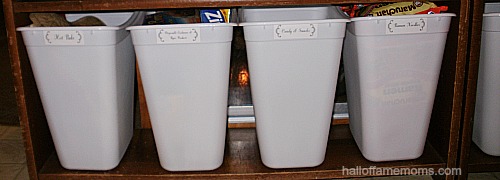
I found white waste containers for $1 each at my local Dollar Tree (in the Belden Village area) and was able to fit 9 of them snuggly on my lower shelves. This gives me a uniformed, organized effect. I am using my affiliate links in this post.
Check out Dollar Tree’s new summer catalog here.
In case you’re wondering what they hold: mostly hot pads and trivets, disposable cooking supplies, candy and treats, Ramen Noodles, misc. decorating and appliance pieces, and cooking magazines.
I have several of the bins labeled using my Avery address labels
(I had on-hand). For the first time I decided to try out the Avery free template for printing on my labels. It’s really pretty easy and fast once you figure it out. I’m still surprised I was able to do it in such a short time, knowing me 🙂 . After I did my labels for these containers, I made address labels for our letters!
I made my own potato & onion bin out of two $1 Dollar Tree trays (I actually bought to slide on the top shelf under the counter) by taking trash ties and twisting them around the trays to make hinges. Then I lined the bottom tray with newspaper and put my potatoes in there.
So – I only spent $11 on top of using what I already had on hand to change up my space and make it more pleasing to work in.
Again, the basic “before” and “after”.
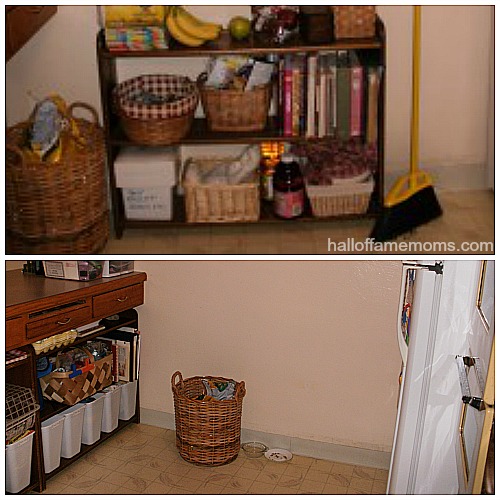
And here’s what it looks like to walk into my kitchen now…

You can view the Dollar Tree online here!
This is just one of my home projects I’ve been up to. Do you have any projects to finish before school starts?
Visit Dollar Tree online at this link.







Seeing storage like this make me so giddy. Love what you did here!
Jen, they were at the end of one of the aisles in the back of the store – near the toy section. Check there!
Amazing what $11 can do! I did something similar in my kids’ rooms!
I love your creative potato and onion holder! I looked for those trash bins for my craft room but someone must have snatched them up! 🙂