*These paper bag cards could be made into party invites, encouragement cards, birthday cards and more! Let the kids help make some too! Let your imagination soar with all the possibilities here. They’re just so adorable.
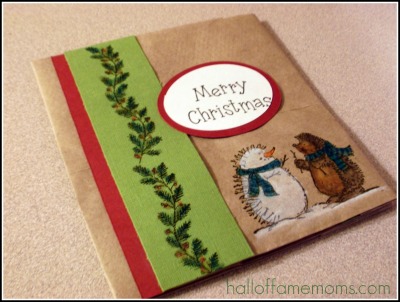
My sister-in-law, Sue, made these cute paper bag Christmas cards and I had to post about them. I haven’t sent Christmas cards for awhile but these got me thinking I might enjoy making them.
Here’s what you do:
Step #1 – Get yourself some lunch-sized paper bags (they come in white and brown).
Step #2 – Lay out the bag and fold in half or determine however long you want your finished, folded card to be.
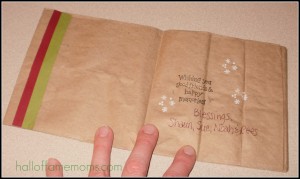
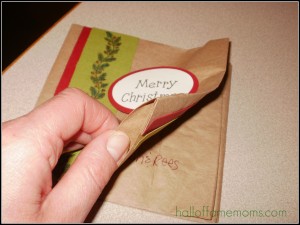
Step #3 – Now you will cut the open end of the bag to whatever length you want your bag to be as stated in step #2. Now fold the end and glue down. Also, glue the other end of the bag where the fold is (the actual “bottom” of the bag).
Step #4 – Now the fun part! Decorate, embellish, stamp, color, glue, paint…whatever you’re heart desires!
I love how simple Sue made her cards. You could also use a hole puncher and make 3 holes at the folded side and then string yarn through for a different look. Make these as simple or as elaborate as you like! They are so cute!
Measure your finished card to see what size of envelopes you’ll need if you are mailing them. Sue’s envelopes came from ActionEnvelopes.com.
Subscribe here to get my posts by email or RSS. Join me on Facebook or Twitter too!



What a wonderfull idea ! I so like craft paper !
You’ll fold the open end of the bag (the end you’d stick the lunch in) over a bit at the end and glue shut. If you need to cut the bag down a bit to fit a particular envelope do that first. As for the OTHER end of the bag, the part that fold down until popped open- you’ll just glue that flat part flat down.
I think I am a little dense. Are you folding the bag with the bottom facing up and then cutting both ends? I’m just really confused. Sorry, they look really cute it’s just me, I think it takes me a little longer to figure things out.
Wow, what a wonderful idea, frugal, and creative. And as beautiful as any card you could buy. I am going to have to keep tip! Thanks so much for linking it!!
these are cute… knowing myself I would iron out the creases 🙂